Create Computer Vision Resource – Computer Vision
Create Computer Vision Resource
In this section, you will learn how to create a computer vision resource using the Azure portal, and after the computer vision service instance is created, you will copy the key and endpoint and save them for later use.
- Log in to the Azure portal. Select Create Resource. Under the AI+Machine Learning category, select Computer Vision, as shown in Figure 4-1.
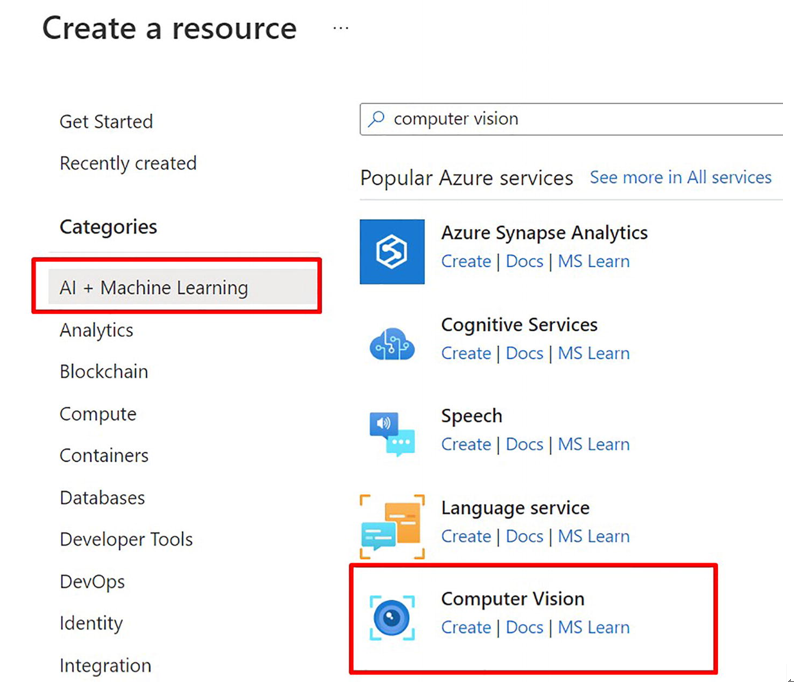
Figure 4-1Finding the Computer Vision service
- Give a subscription, resource group, region, resource name, and pricing tier, then click Create as shown in Figure 4-2.
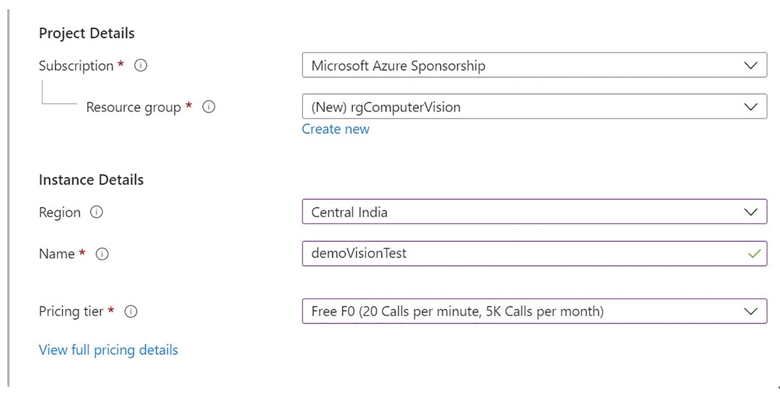
Figure 4-2Select region, resource name, and pricing tier
- After a few minutes, you would get your newly deployed Computer Vision service instance as shown in Figure 4-3.
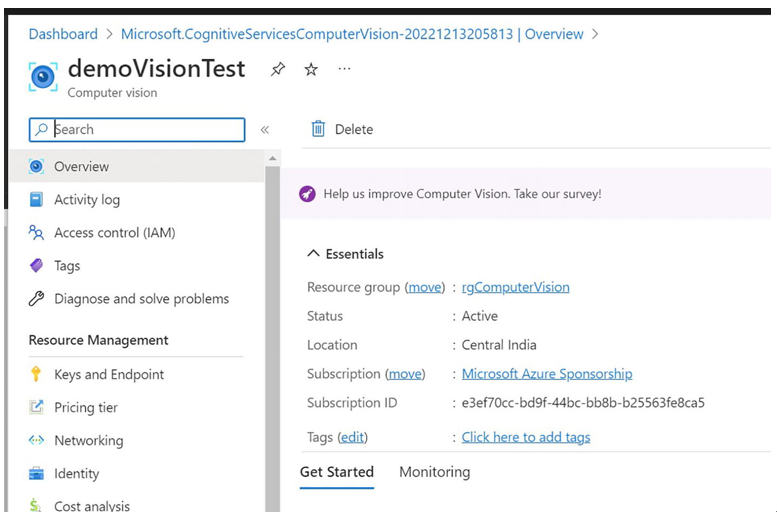
Figure 4-3Newly provisioned computer vision resource
- Under Resource Management, copy Key 1 and Endpoint as shown in Figure 4-4.
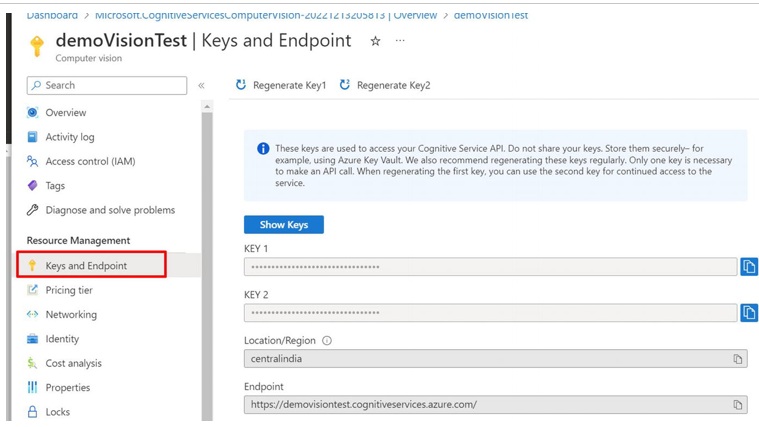
Figure 4-4Copy the Key 1 and Endpoint
Connect a Console App to Computer Vision Resource
- Download the code provided by Microsoft from the link:
https://github.com/Azure-Samples/cognitive-services-quickstart-code/blob/master/dotnet/ComputerVision/REST/CSharp-analyze.md#handwriting-recognition-c-example - Now, create a new C# console app in Visual Studio as shown in Figure 4-5 and Figure 4-6.
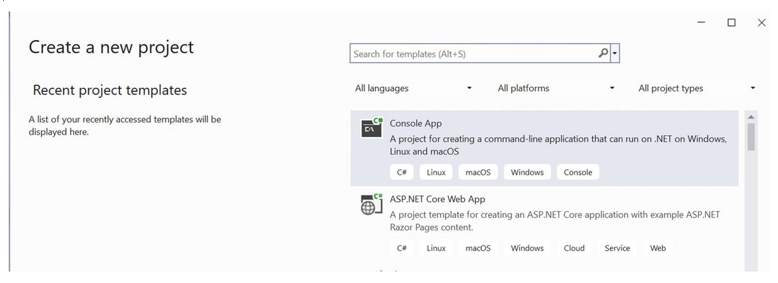
Figure 4-5Select the Console App template in Visual Studio
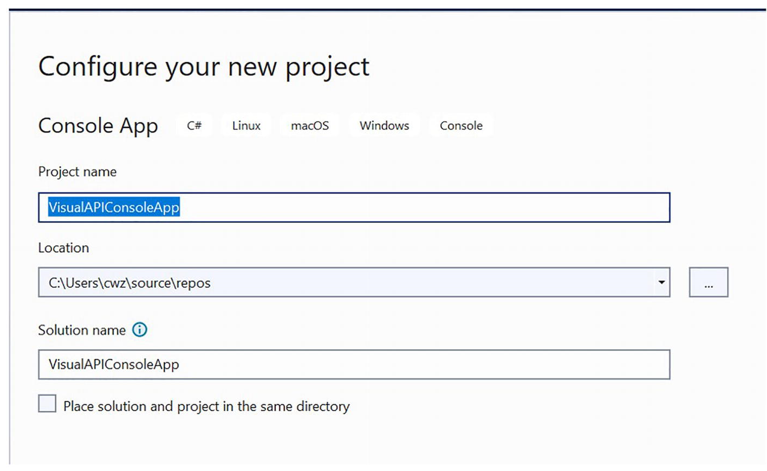
Figure 4-6Provisioning a console application
- Choose .NET 6.0 (Long-term support) as the Framework option as shown in Figure 4-7.
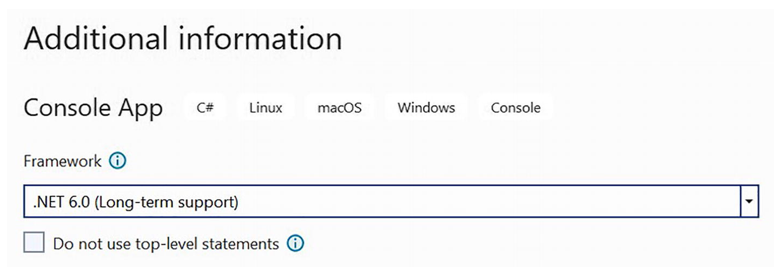
Figure 4-7Choose .NET 6.0
- Using the NuGet Package Manager, add the Newtonsoft.Json package as shown in Figure 4-8.
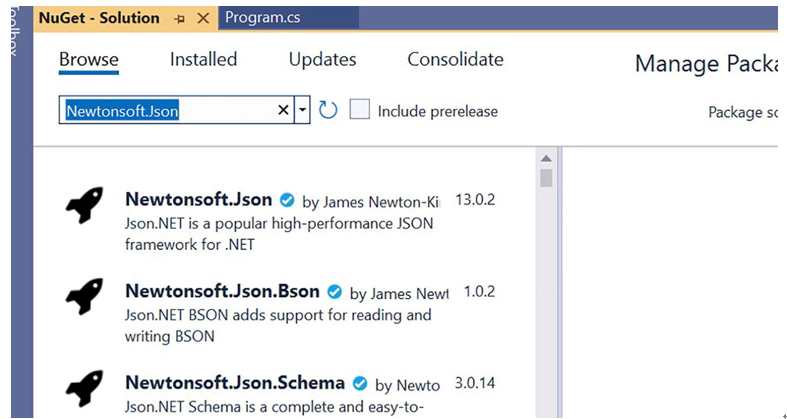
Figure 4-8Add Newtonsoft.Json using the NuGet Package Manager
- Under Browse, click Install on Newtonsoft.Json as shown in Figure 4-9.
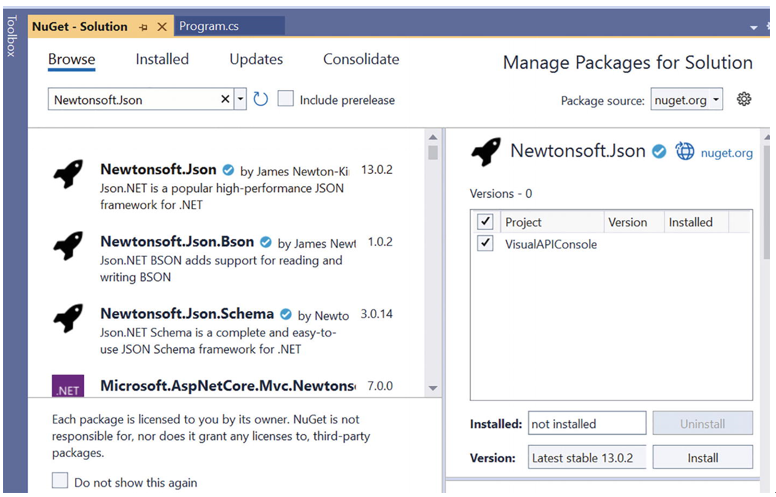
Figure 4-9Installing the latest stable version of Newtonsoft.Json
- Replace the Subscription Key and Endpoint from our Azure Portal and paste them into the Program.cs file as shown in Listing 4-1.
namespace CSHttpClientSample{
static class Program {
//Add your Computer Vision subscription key and base endpoint.
static string subscriptionKey = “PASTE_YOUR_COMPUTER_VISION_Resource_KEY_HERE”;
static string endpoint = “PASTE_YOUR_COMPUTER_VISION_ENDPOINT_HERE”;
Listing 4-1Replace the Key and Endpoint, which you copied from your recently deployed Computer Vision service
- Also, instead of analyze, you must call the OCR endpoint as shown in Listing 4-2.
// the Analyze method endpoint
static string uriBase = endpoint + “vision/v3.1/ocr”;
Listing 4-2Changing endpoint to ocr
- Get some images for the Vision API to parse. I have my two images here as shown in Figure 4-10. You can download a few images from the given link here:
https://github.com/Azure-Samples/cognitive-services-sample-data-files/tree/master/ComputerVision/Images
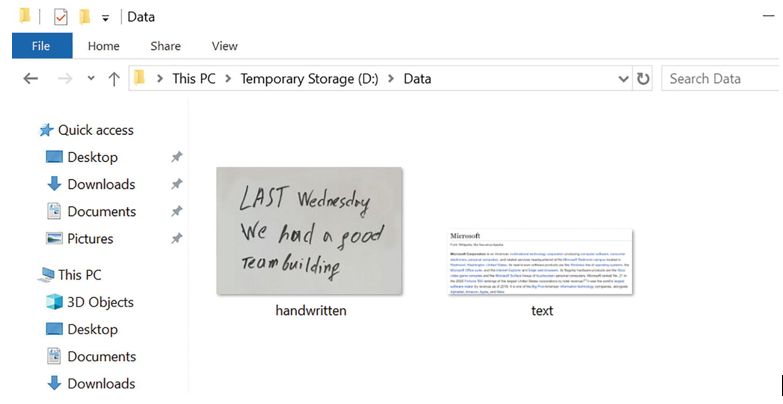
Figure 4-10Images used to be tested by the Vision API
- Set the “imageFilePath” variable to the image’s location and run the code as shown in Listing 4-3.
//the Analyze method endpoint
static string uriBase = endpoint + “vision/v3.1/ocr”;
// Image you want to be analyzed (add to your bin/debug/netcoreappX.X folder)
static string imageFilePath = @”D:\Data\handwritten.jpg”;
Listing 4-3Providing an image path in the code to be parsed for
- When you run the application, you will see the output as shown in Listing 4-4 for the image “handwritten.jpg.”
Response:{
“language”:”en”,
“textAngle”:-0.07155849933176689,
“orientation”:”Up”,
“regions”:[
{
“boundingBox”:”96,88,330,373″,
“lines”:[
{
“boundingBox”:”96,88,210,121″,
“words”:
{
“boundingBox”:”96,98,145,111″,
“text”:”LIU”
},
{
“boundingBox”:”246,88,60,97″,
“text”:”T
}
]
},
{
“boundingBox”:”106,239,320,101″,
“words”:[
{
“boundingBox”:”106,247,111,90″,
“text”:”we”
}
]
}
]
}
]
}
Listing 4-4Output for the image “handwritten.jpg”
- Change the path to the other image, “text.jpg,” as shown in Listing 4-5, and then run the application.
//the Analyze method endpoint
static string uriBase = endpoint + “vision/v3.1/ocr”;
// Image you want to be analyzed (add to your bin/debug/netcoreappX.X folder)
static string imageFilePath = @”D:\Data\text.jpg”;
Listing 4-5Passing another image named “text.jpg” to the code
- When you execute the program, you will see the output shown below in the Listing 4-6 for the image “text.jpg.”
Response:{
“lanugage”:”en”,
“textAngle”:0.0,
“orientation”:”Up”, “regions”:[
{
“boundingBox”:”20,26,1111,376″,
“lines”:[
{
“boundingBox”:”21,26,184,33″,
“words”:[
{
“boundingBox”:”21,26,184,33″,
“text”:”Microsoft”
},
]
},
{
“boundingBox”:”22,91,326,18″,
“words”:[
{
“boundingBox”:”22,91,43,14″,
“text”:”From”
},
{
“boundingBox”:”71,91,88,18″,
“text”:”Wikipedia”
}
]
}
]
}
]
}
Listing 4-6Output for the image “text.jpg”

